~ PART TWO~
Directly below is the summery from the first post. To read part one please link to the first post RIGHT HERE.
 |
| (Home made bread goes with everything!) |
“Tired kinda day but need to make bread so I halved the batch and will work on four loaves. Just didn’t feel up to wrestling eight loaves all day. I had good company, my three year old is always happy to help with baking.
So, for fun, I decided to try capturing step by step shots of the process I carry out weekly. “
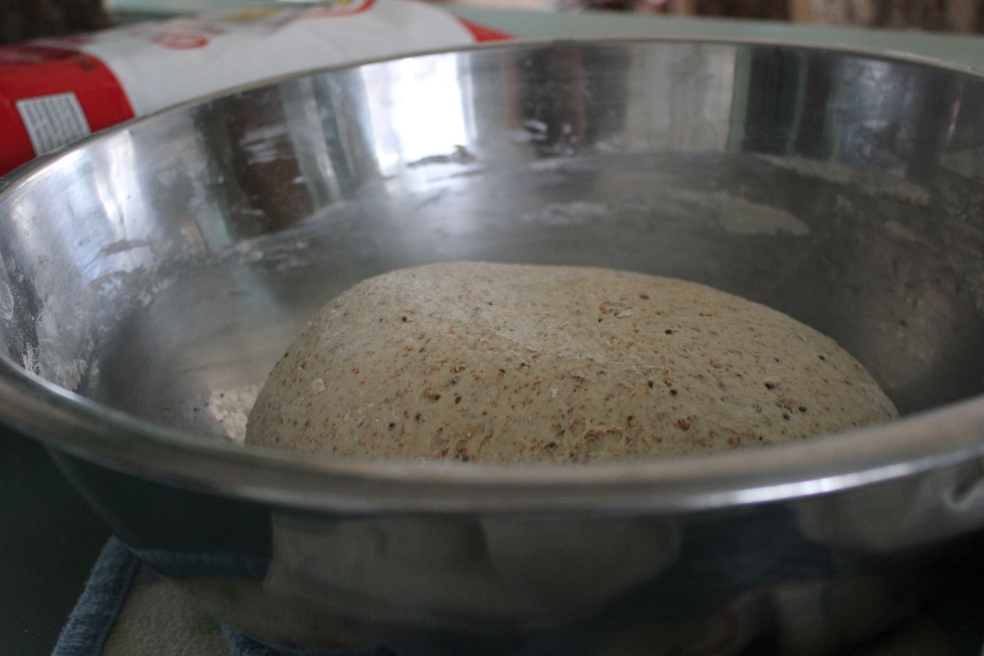
1. Dough is done so let it rise and beat it down (kneading it) about three or four times during the course of the day.
 |
| (Ready to rise.) |
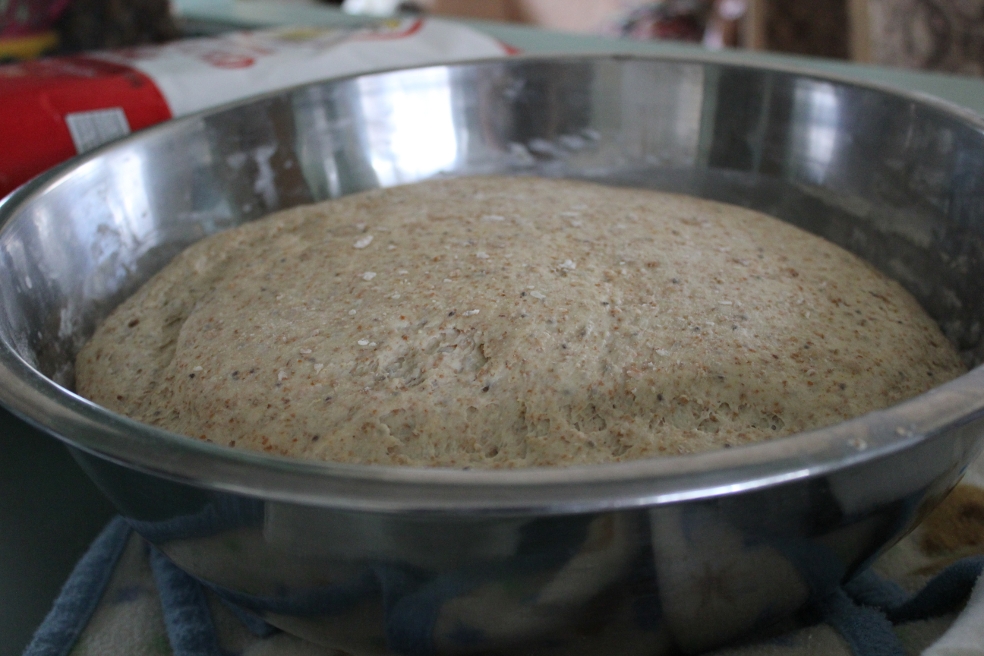
 |
| (Risen.) |
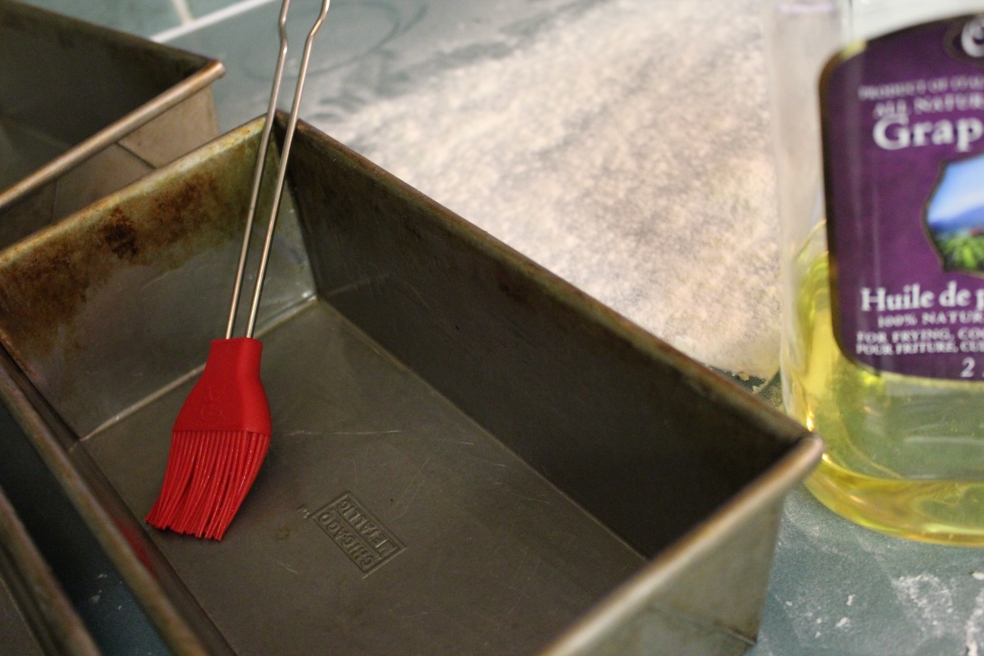
2. Once it has had a few rounds of rising and kneading, you oil the pans (if they aren’t seasoned already). These silver pans are my unseasoned ones (the seasoned ones have turned black). My husband bought these lovely pans, for me, from a baking school in the States.
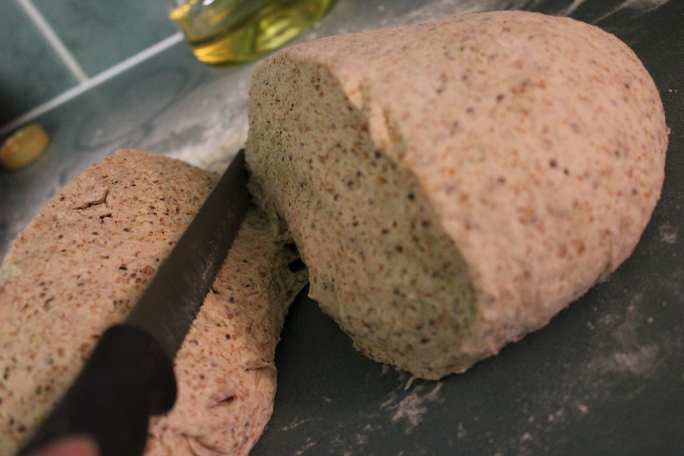
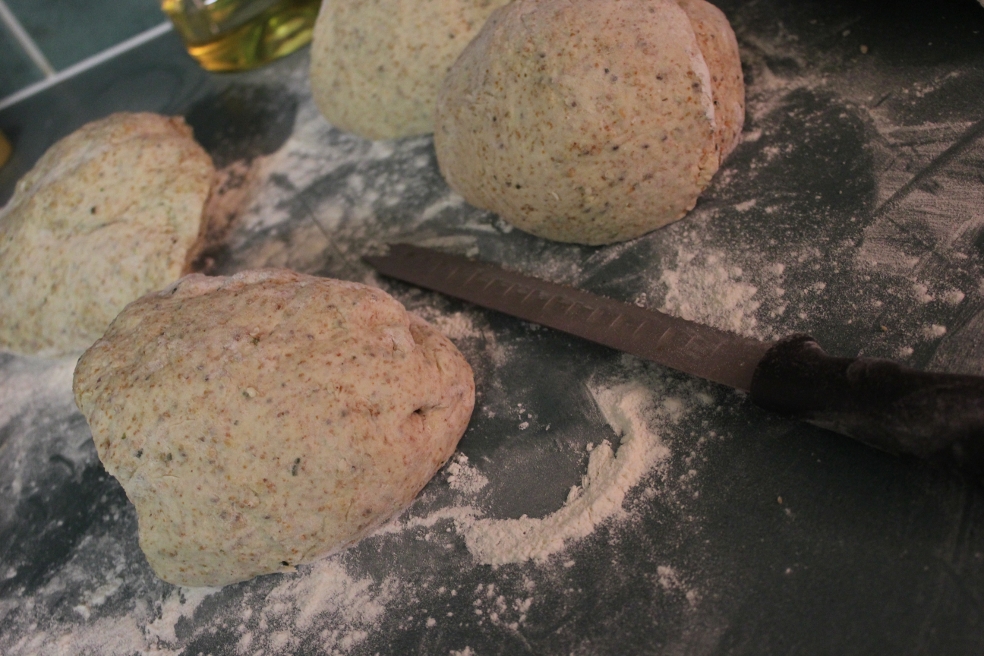
3. Dough is kneaded down for the last time then sliced into four lumps (since this is the half batch).
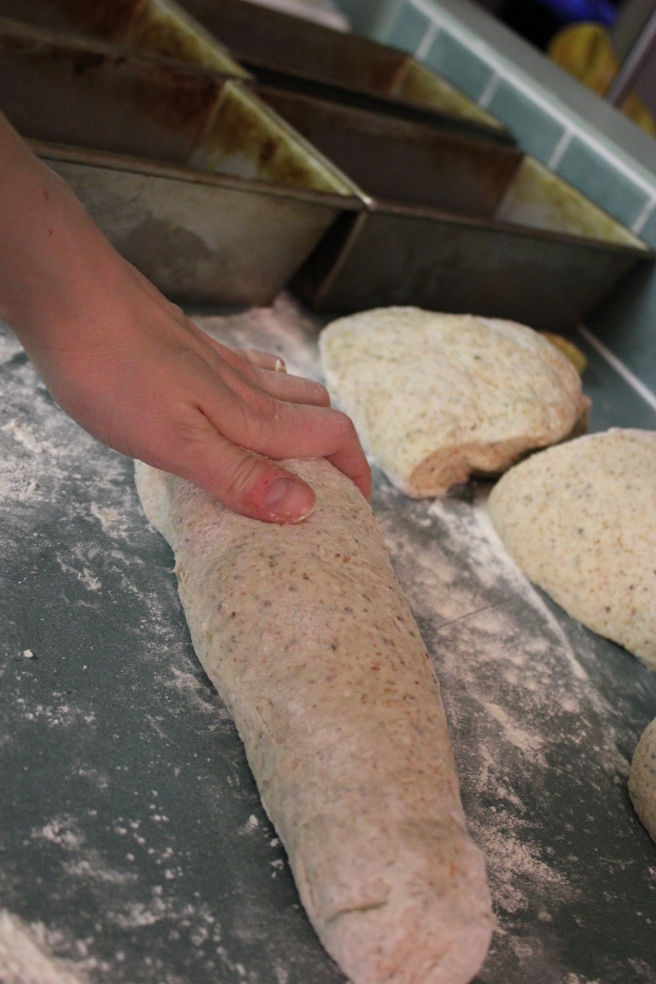
4. Lumps are encouraged into loaf shapes. I roll mine mostly. It is done similarly to what you did when making snakes out of play dough as a child!
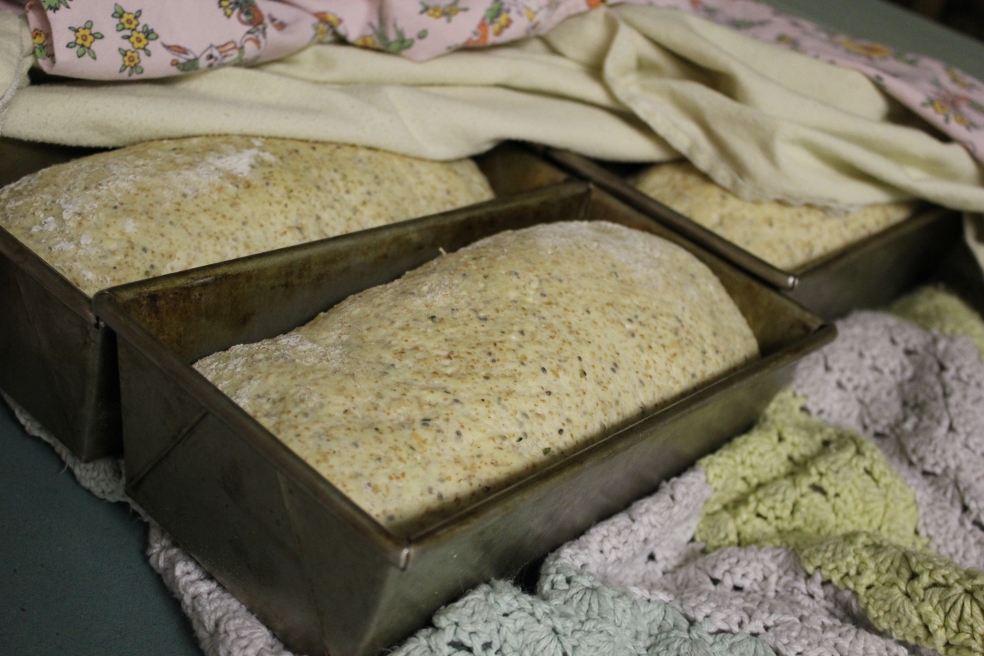
5. Loaves are placed in pans and again covered up is a cozy fashion.
6. They rise in about two hours.
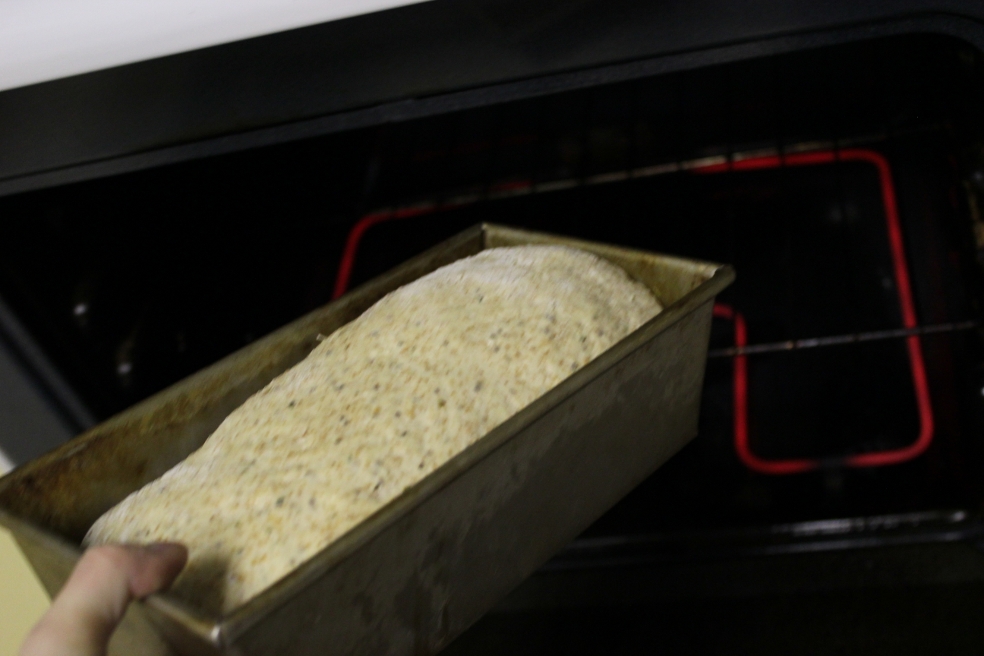
7. Pans of risen loaves of dough are put in 400 degrees for about 20 minutes.
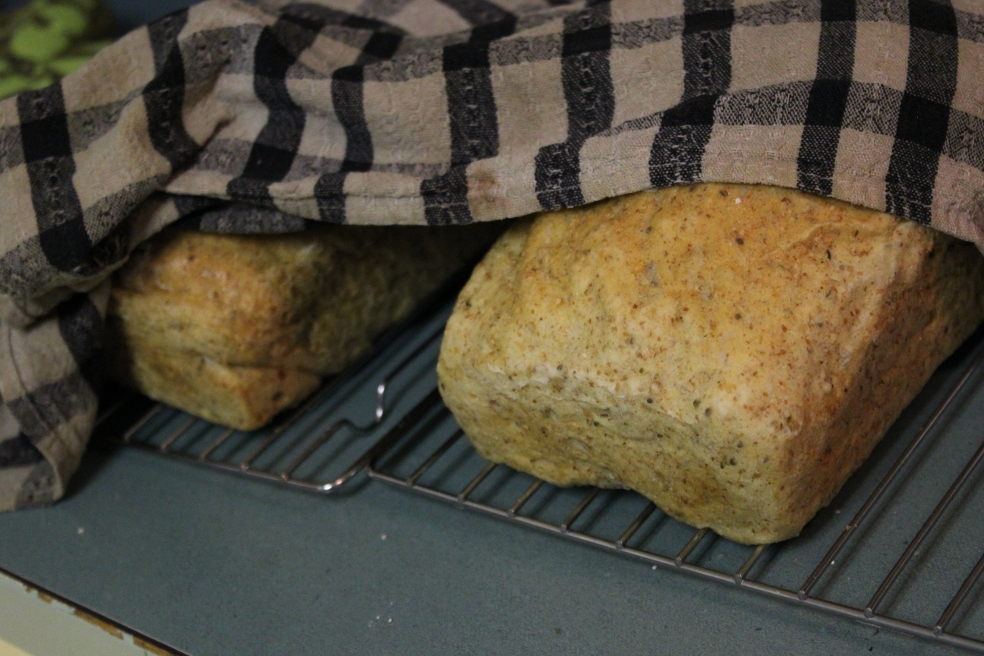
8. Once nicely golden they are popped out of their pans and set upon my cooling racks. I then cover them with a damp tea towel. This method, gleamed from my sister in laws Dutch mother (HELLO ANNA!), cools and keeps the bread from becoming too crusty. My mother used to butter them, which is a delicious method to accomplish the same but I found got really messy with the amount of bread I make and with having to bag and freeze it as I do.
9. Step nine and ten are both very important. Nine is to take a minute and bask at the beautiful domestic treasure that is fresh home made bread. Pat yourself on the back 🙂
10. Step ten, is credited to my husband… for Pete sake don’t freeze all the loaves you just made! Put one aside to be sampled immediately and to be enjoyed untouched by the freezer.
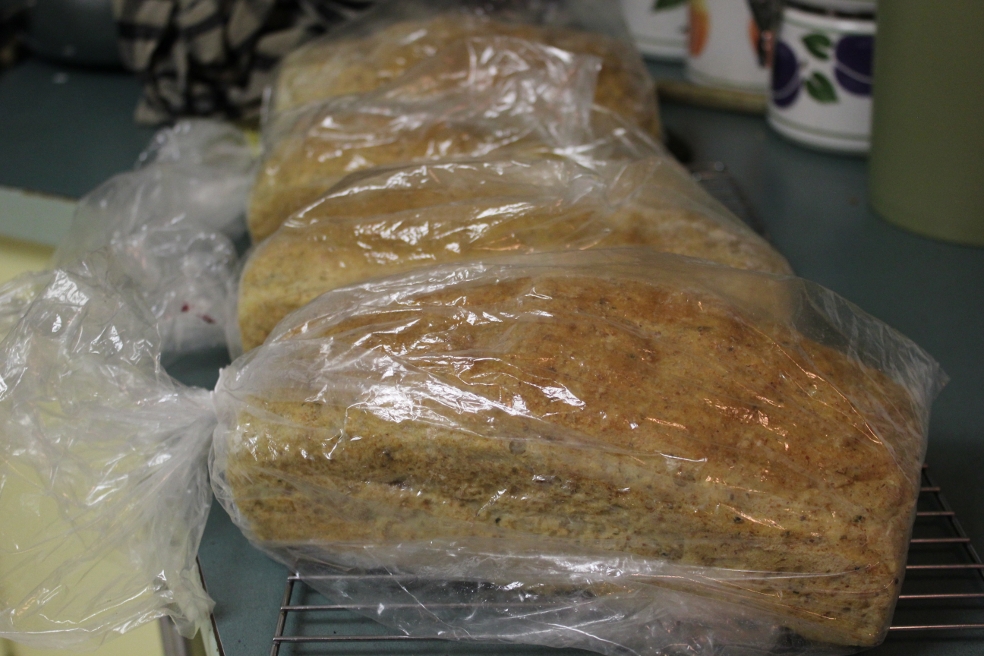
11. Once cooled nicely bag them.
12. Put the majority of your labor in the freezer to be sure it is stretched all week. It thaws beautifully and is very nice if bagged well and placed in a large chest freezer.
So there we are, managed to make this into a twelve step process too. From dough to bread, ta-da! And now REPEAT, if you have a bread loving family as large as mine you will have to be faithful at this weekly (twice weekly when halved) process to keep your family amply provided for in the toast and sandwich department. Have a beautiful day!
TTFN


The smell of fresh bread rising and baking is soooooo wonderful. I know you missed out in this area but just to remind you that you add this gift to your homey home when you bake bread. Love you MOM.
Rebecca has become a true master in this art of bread-making. Consider that in the last two years she has made over 800 loaves of bread. And that from a wild variety of flours, seeds, nuts, etc… We are truly blessed as a family to daily enjoy home-made bread. We have purchased fancy breads from the various bakeries in town, and I haven’t found anything as nice as what Rebecca makes on a weekly basis.