
A cold has kept me stuck at home for almost two weeks, voiceless for the last week, and while colds are one of my least favorite things about winters set in, there are many other things worthy of a double thumbs up. Thumbs up is my youngest child’s favorite way to express pure pleasure in the littlest of things. I have collected my current top five winter wonderfuls, in no particular order, to share.
All posts in Domestic Damsel

It’s Good

It was a treasure hunt, that is how I kept my four year old son interested as we rummaged through another thrift store. In the first isle he found a little red stool just his size. From then on I was followed by a very happy little man who worked hard to carry this stool all over the store. When ever we stopped he was filled with joy at the access his stool gave him to the higher up shelves. And oh how we hunted. I found a few things for Christmas and he found a colouring book… but in the end the biggest treasure was his red wooden stool… which we of course took home.
Church Kitchens and Community

Church kitchens are so much larger then the average at home kitchen. I couldn’t figure out where most things were and I had this awful feeling that I would be of no use to them. THEY were ladies from my church, part of the Women’s Ministry Team, who had obviously been in this kitchen many times before, working together. Their cheerful and contagious banter soon eased my nerves. Belly laughs and warm smiles were everywhere around me as they busied themselves with the brunch preparations. I adored being welcomed in to their group, such servants hearts and such amazing ladies!
A Week Of Mornings

If you like table top books I highly recommend ‘A Year of Mornings’. Inspired by this photography book’s subject and approach, AND to celebrate not being sick every morning any more, I collected a week of morning pictures for this post
French Jam and Iced Tea
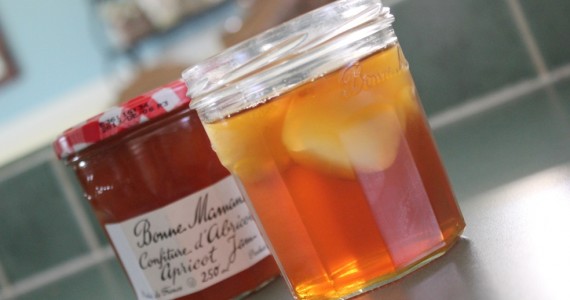
Call it thrifty or good recycling, I like the sound of ‘clever domesticity’! A little inexpensive solution for at home is always a treasure of a find when it is a pretty solution as well!
My Guac! (Recipe Request)
I’m going to share a recipe that has become a family tradition in our house. It is a long time party favorite, and has changed many a persons opinion on avocados. Time to share it. Sorry that I couldn’t remember where I found it, so you will have to try my altered version.
LIGHT Guacamole
(Yields 2 Cups)
 |
| (The Guac is on the left, with yellow peppers.) |
1 cup cottage cheese
1 Tbsp sweet onion (or 1 1/2 tsps onion flakes)
1-3 garlic cloves minced (add as many as you think you can handle)
1 tsp salt (add more to taste)
pinch cayenne pepper
3 tsps lemon or lime juice
1-2 avocados (your choice based on how light you want it)
1 sweet bell pepper chopped
- Chop fine the sweet onion, mince the garlic and peel and chunk the ripe avocado(s).
- Process all ingredients but the bell pepper, till smooth. I like to leave some of the avocados chunky but it is your preference again.
- Chop the pepper (red is nicest) and place about a third of it in the bottom of a bowl.
- Add half the guacamole on top of the peppers.
- Scatter more peppers and then add the last of the dip.
- Sprinkle the last of the peppers on top.
- Cover with plastic wrap and be sure the plastic is touching the entire surface of the dip (or it will brown).
- Refrigerate for about 2 hours for best taste. Use up with in 24 hours.
- Serve with Taco style chips or veggies.
TTFN
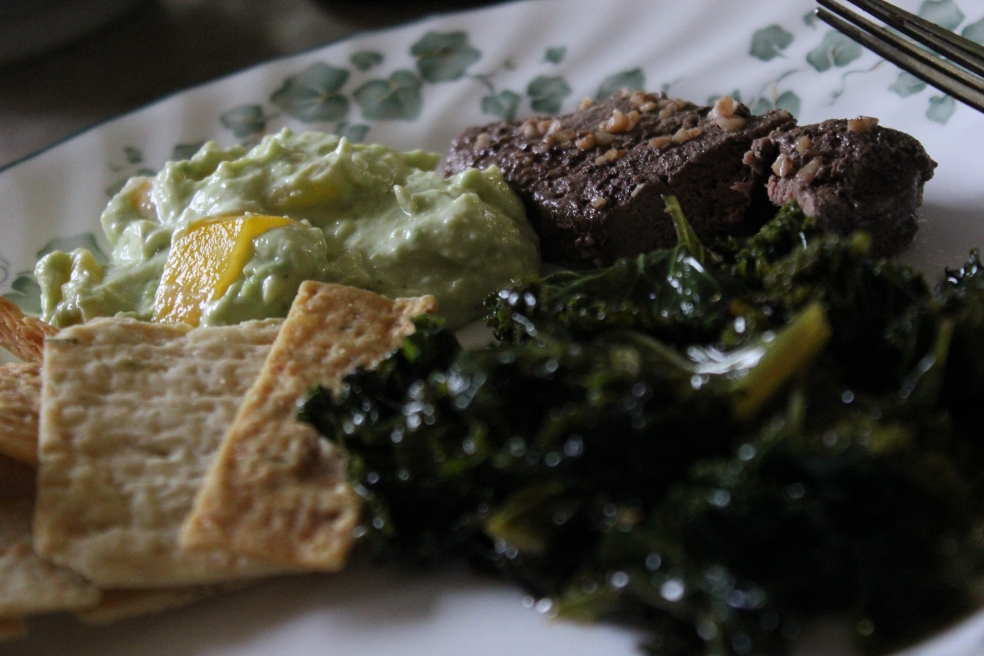
H’orderves on the Menu

Since Garnet was diagnosed with hypoglycemia the traditional meat and potato meals have been out the window in our house. While it was a struggle to learn to cook with NO SUGAR and LOW STARCH I am finding a groove. Add to this dietary restriction four kids to cater to….
To be honest, this Mama isn’t the catering type. If I serve them something they don’t like (after having tried it) I will reintroduce it over and over till they DO like it. This is how I won on the avocado front!
All that good parenting advice aside, I like to treat them now and again. That means asking what they would like for supper or making something I know they will love. On the weekend I surprised them with pancakes and strawberries for lunch (high protein and fiber, sugar free but they didn’t no that). The other night I needed a meal in a hurry and dared to ask for their hearts desires. They all agreed on ‘salmon h’orderves’. I started making them cracker topped snacks years ago and to them it is the fanciest of my meals.
Salmon h’orderves is what they call the meal in the photograph at the top of the post. Salmon salad atop some greens on a cracker and then topped with cheese, in this meals case we had havarti. I boiled a few eggs, steamed some broccoli and made an avocado salad for good measure… done in little time. One of my oldest kids found the home made apple cinnamon sauce in the fridge and requested it as ‘a side’… since it too is sugar free I agreed with little pressure.
The kids had seconds and thirds and…I told them I was done making h’orderves when they pleaded for fourths. A speedy, healthy meal all around and all the better because my crew thought it was grand!
Do you make your kids h’orderves’? If so what are yours like? Fancy actual h’orderves or ‘kid style’ ones?
Bless you and your meal making efforts!
TTFN
Half the Batch (The Making of Bread Process)
~ PART TWO~
Directly below is the summery from the first post. To read part one please link to the first post RIGHT HERE.
 |
| (Home made bread goes with everything!) |
“Tired kinda day but need to make bread so I halved the batch and will work on four loaves. Just didn’t feel up to wrestling eight loaves all day. I had good company, my three year old is always happy to help with baking.
So, for fun, I decided to try capturing step by step shots of the process I carry out weekly. “
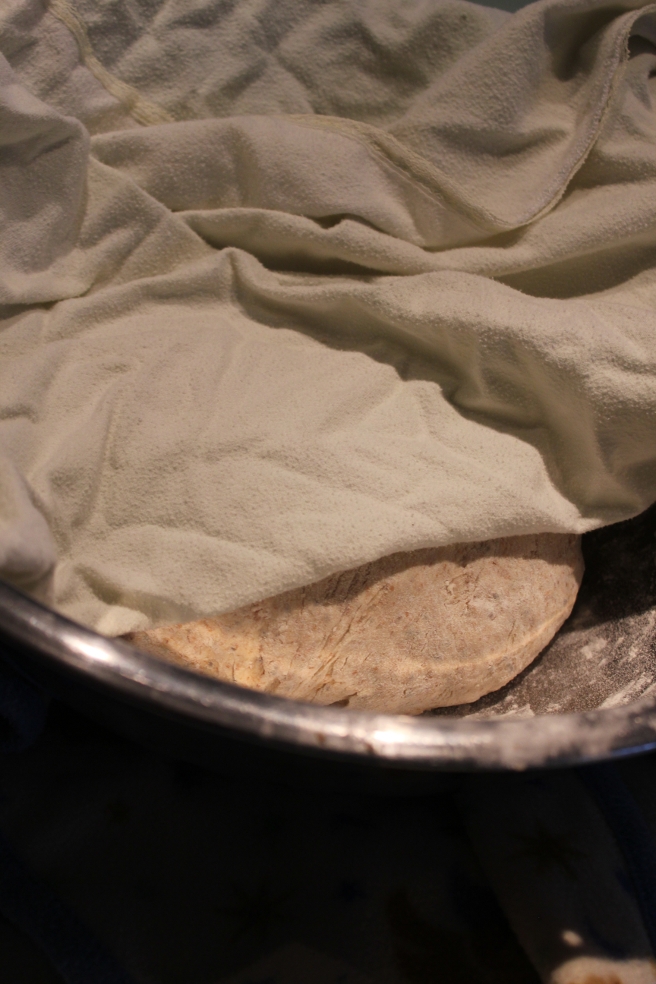
1. Dough is done so let it rise and beat it down (kneading it) about three or four times during the course of the day.
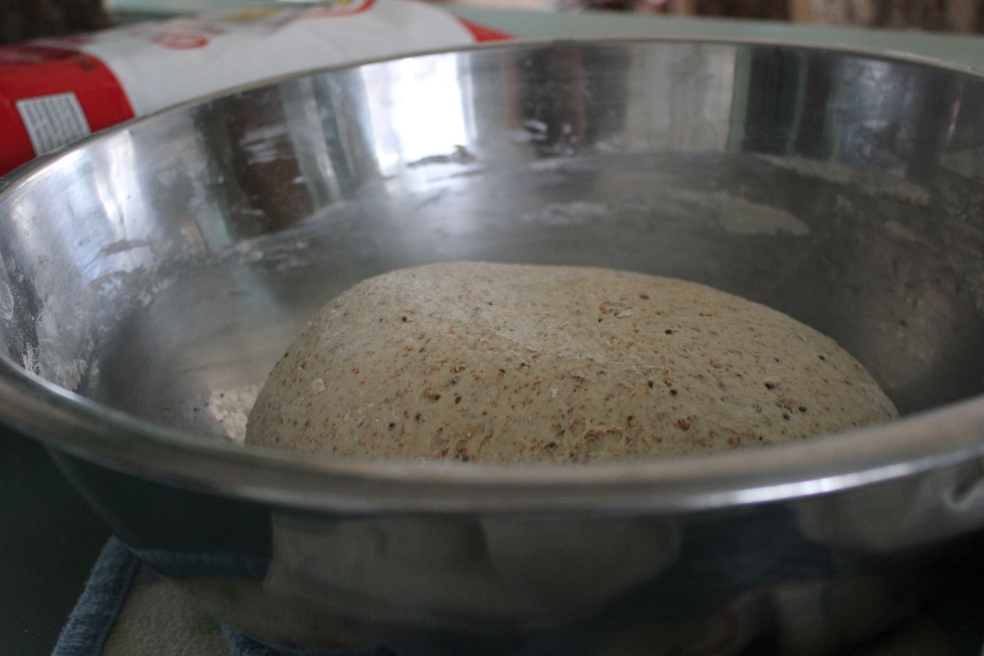 |
| (Ready to rise.) |
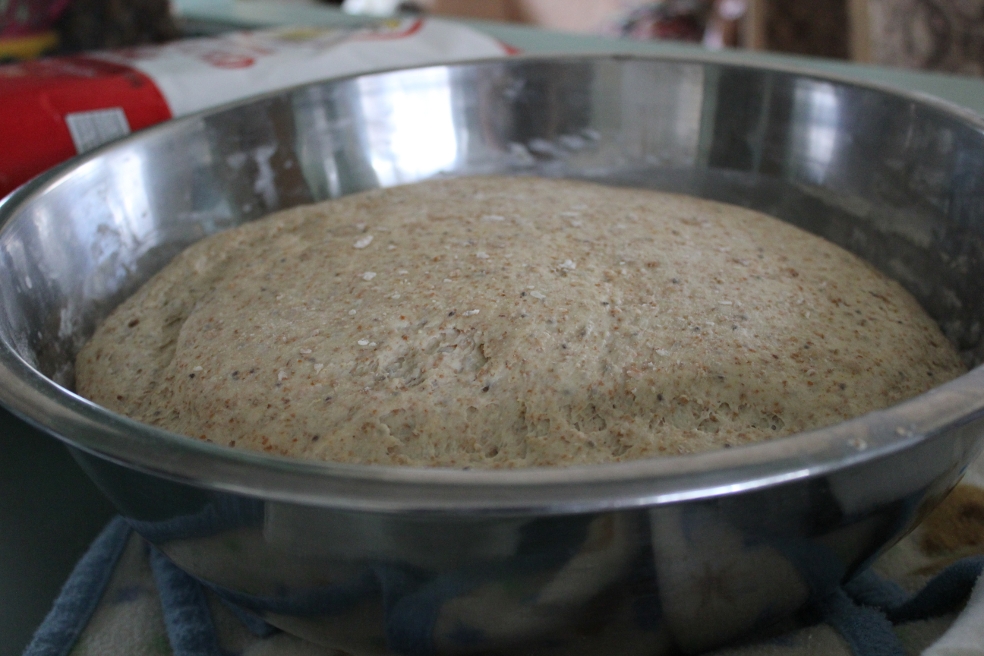 |
| (Risen.) |
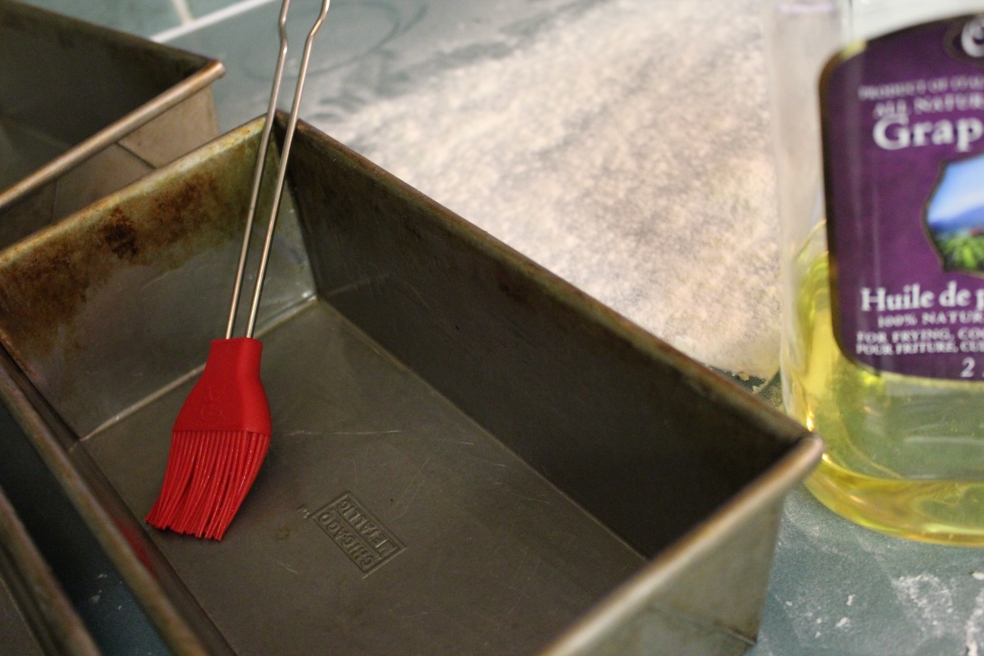
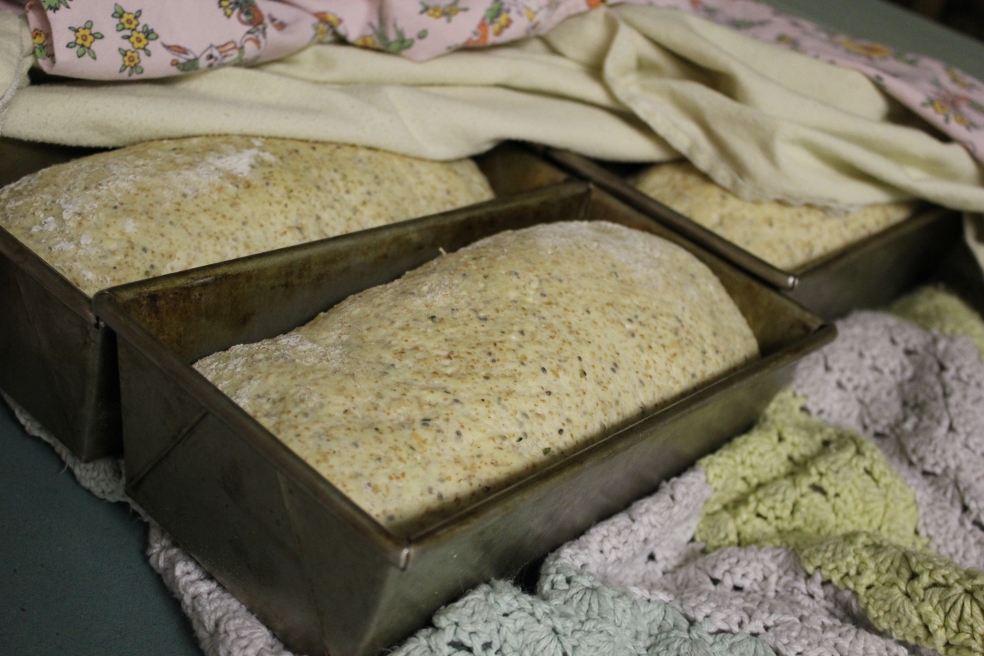
2. Once it has had a few rounds of rising and kneading, you oil the pans (if they aren’t seasoned already). These silver pans are my unseasoned ones (the seasoned ones have turned black). My husband bought these lovely pans, for me, from a baking school in the States.
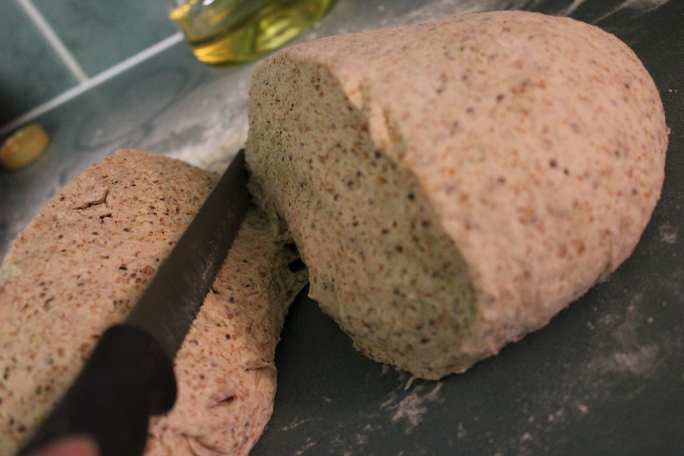
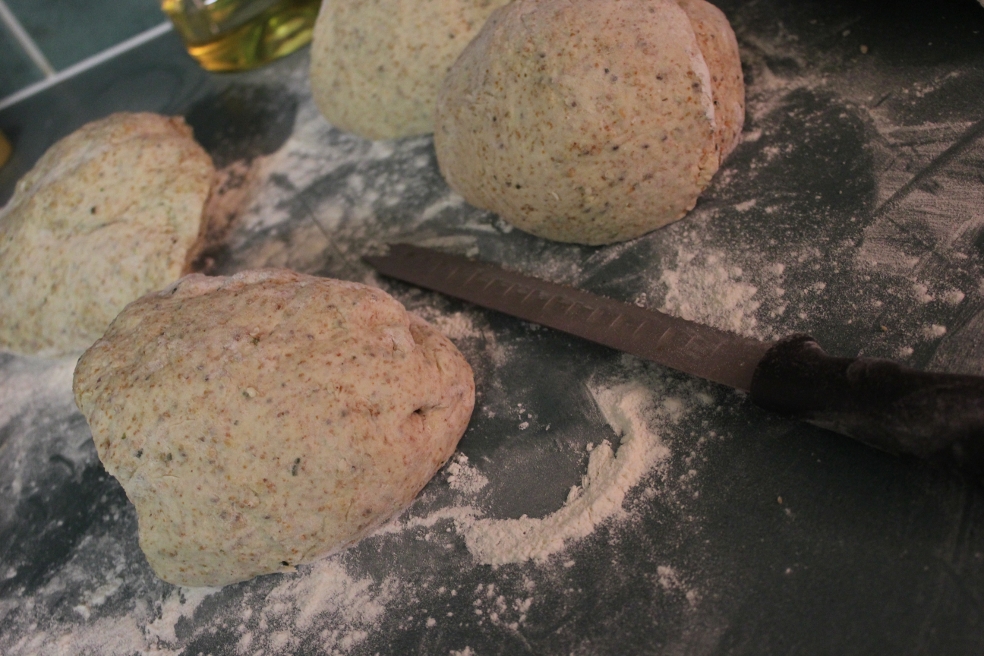
3. Dough is kneaded down for the last time then sliced into four lumps (since this is the half batch).
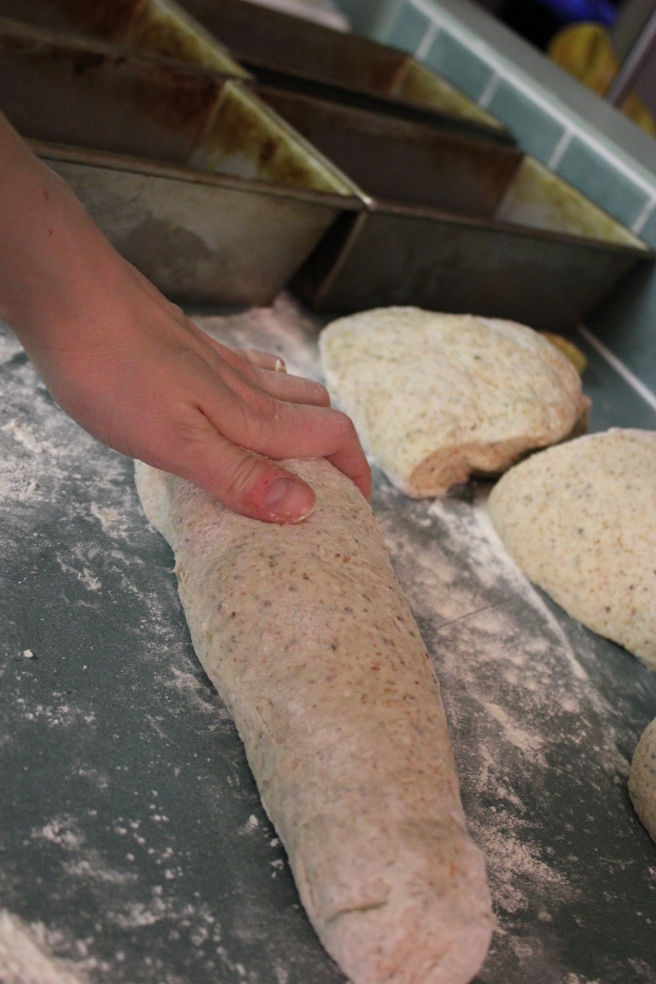
4. Lumps are encouraged into loaf shapes. I roll mine mostly. It is done similarly to what you did when making snakes out of play dough as a child!
5. Loaves are placed in pans and again covered up is a cozy fashion.

6. They rise in about two hours.
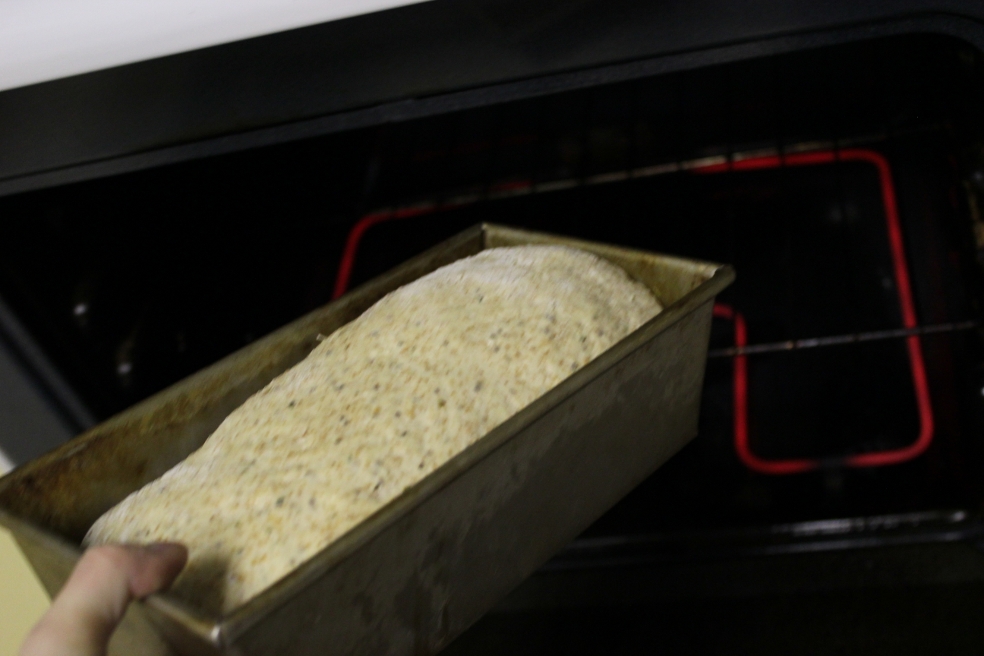
7. Pans of risen loaves of dough are put in 400 degrees for about 20 minutes.

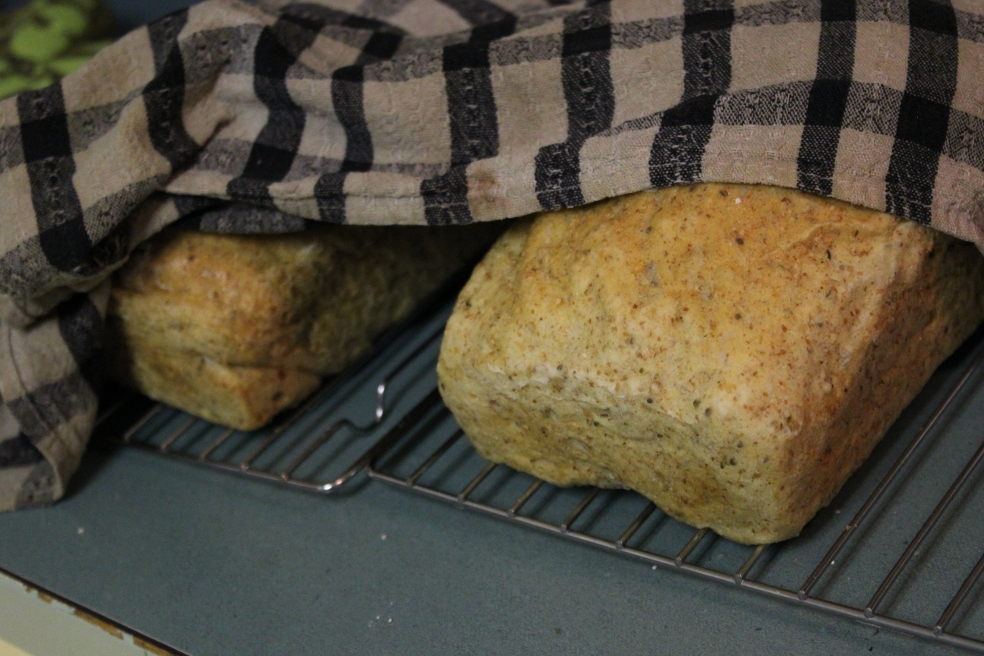
8. Once nicely golden they are popped out of their pans and set upon my cooling racks. I then cover them with a damp tea towel. This method, gleamed from my sister in laws Dutch mother (HELLO ANNA!), cools and keeps the bread from becoming too crusty. My mother used to butter them, which is a delicious method to accomplish the same but I found got really messy with the amount of bread I make and with having to bag and freeze it as I do.
9. Step nine and ten are both very important. Nine is to take a minute and bask at the beautiful domestic treasure that is fresh home made bread. Pat yourself on the back 🙂

10. Step ten, is credited to my husband… for Pete sake don’t freeze all the loaves you just made! Put one aside to be sampled immediately and to be enjoyed untouched by the freezer.
11. Once cooled nicely bag them.
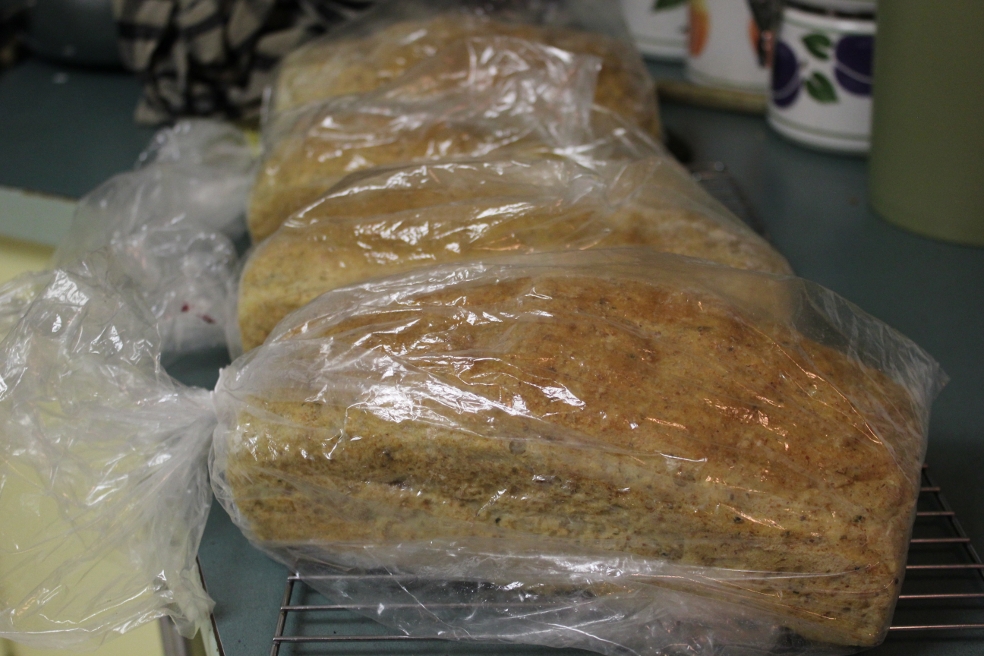
12. Put the majority of your labor in the freezer to be sure it is stretched all week. It thaws beautifully and is very nice if bagged well and placed in a large chest freezer.
So there we are, managed to make this into a twelve step process too. From dough to bread, ta-da! And now REPEAT, if you have a bread loving family as large as mine you will have to be faithful at this weekly (twice weekly when halved) process to keep your family amply provided for in the toast and sandwich department. Have a beautiful day!
TTFN
Half the Batch (The Making Dough Process)
~ PART ONE~

Tired kinda day but need to make bread so I halved the batch and will work on four loaves. Just didn’t feel up to wrestling eight loaves all day. I had good company, my three year old is always happy to help with baking.
So, for fun, I decided to try capturing step by step shots of the process I carry out weekly.
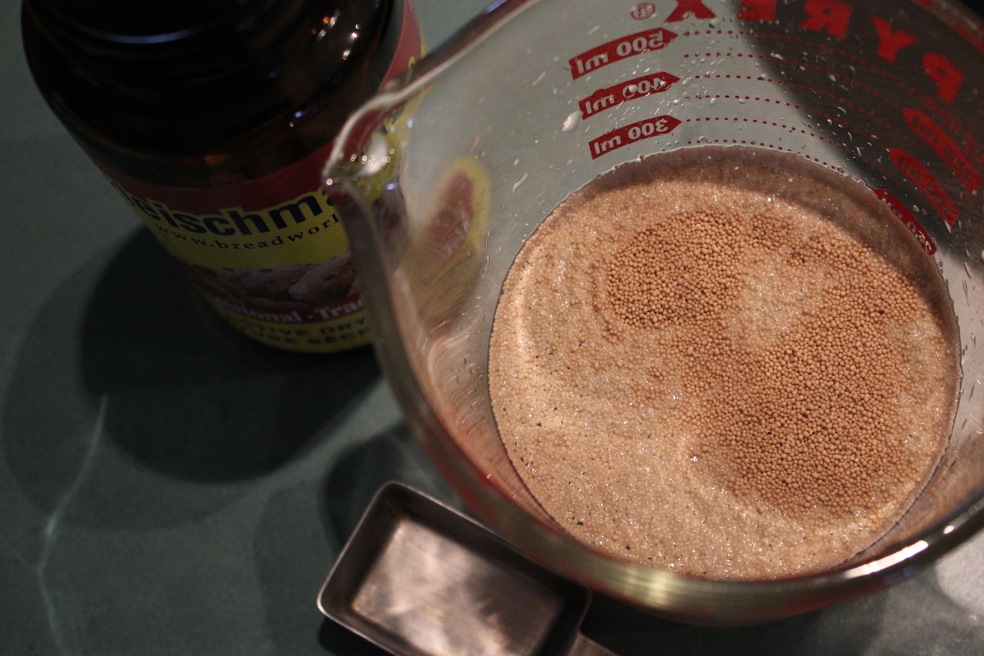
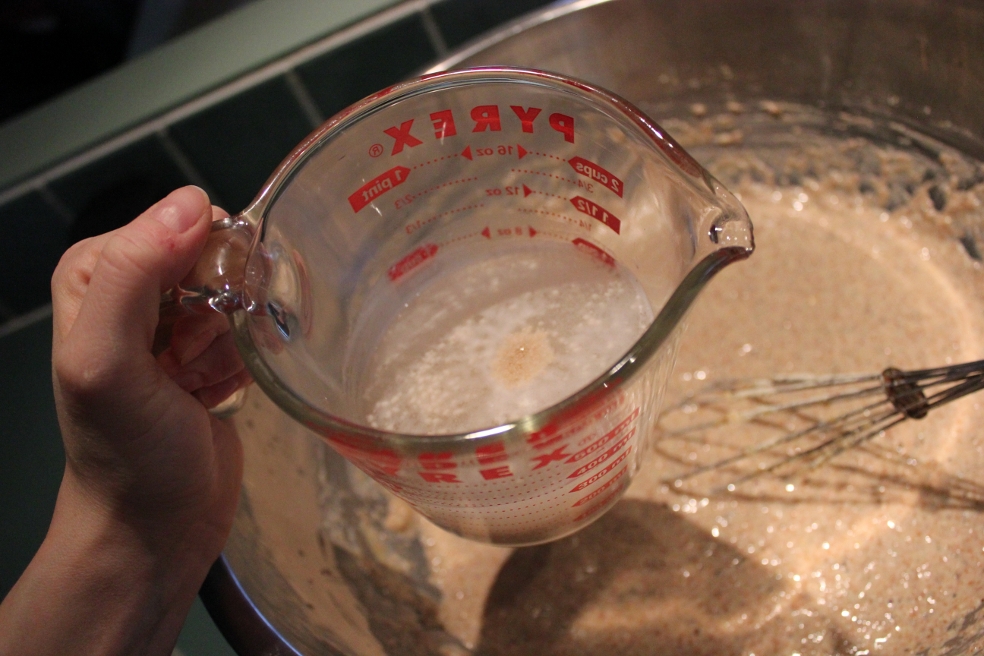
1. It all starts with the yeast. Warm water, traditional dry active yeast and waiting for it to wake up.
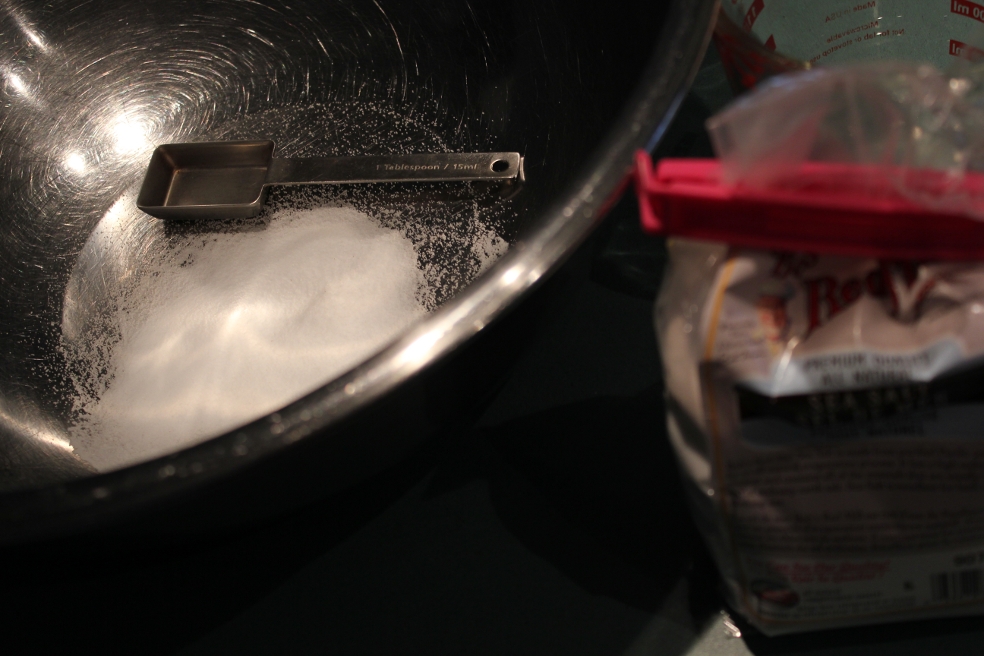
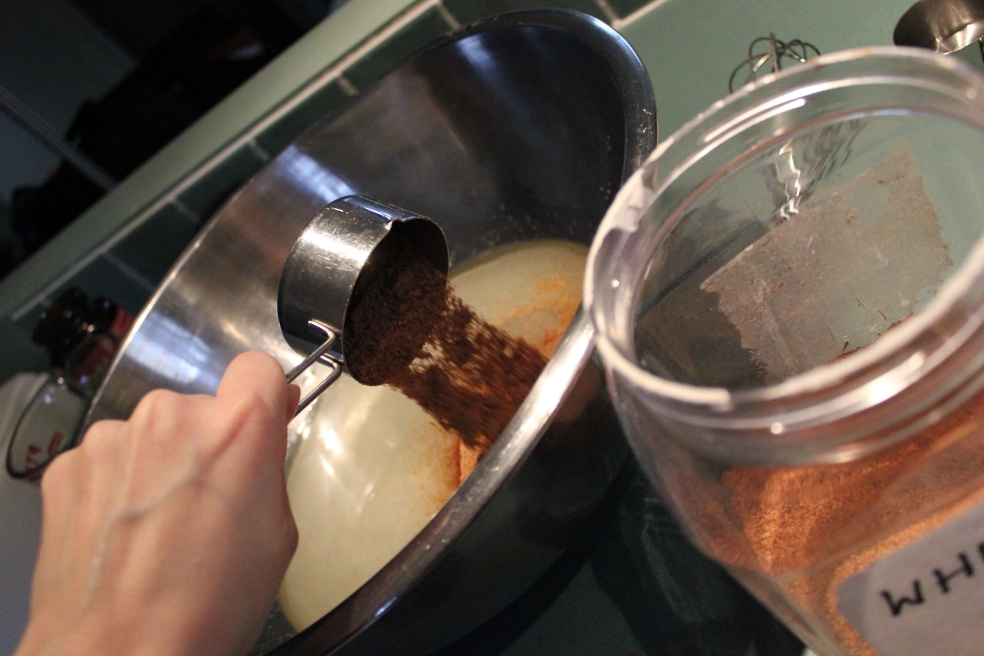
2. While the yeast is working I get the sea salt into THE bread bowl.
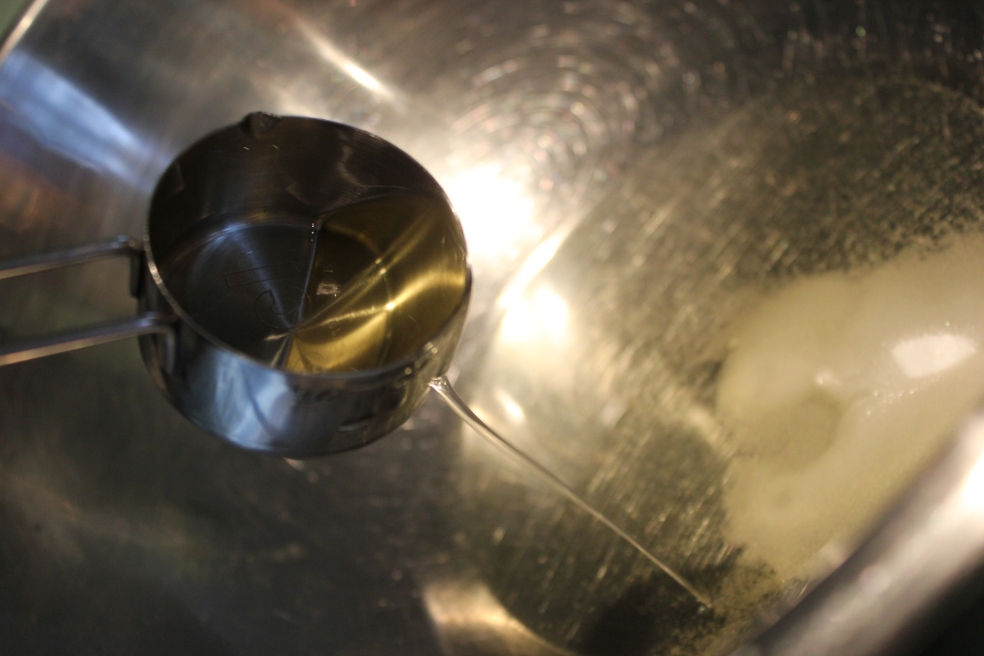
3. Oil of choice is added and today it is grape-seed. Often I add a mix of grape-seed and olive oil but not on a tired kinda day like today.
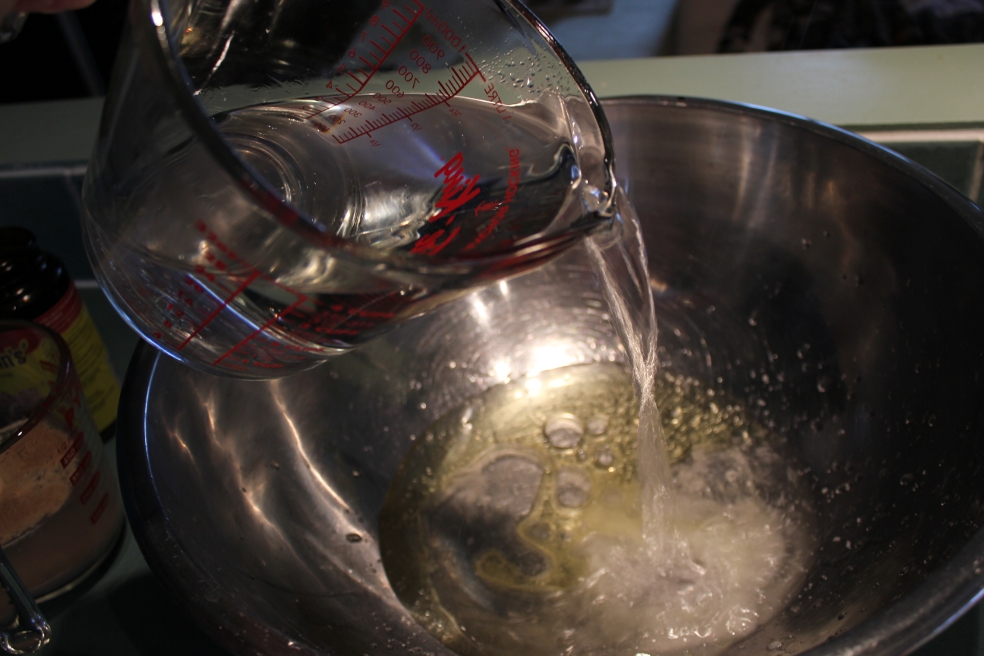
4. Water, warm water is added and whisked in with the oil and salt.
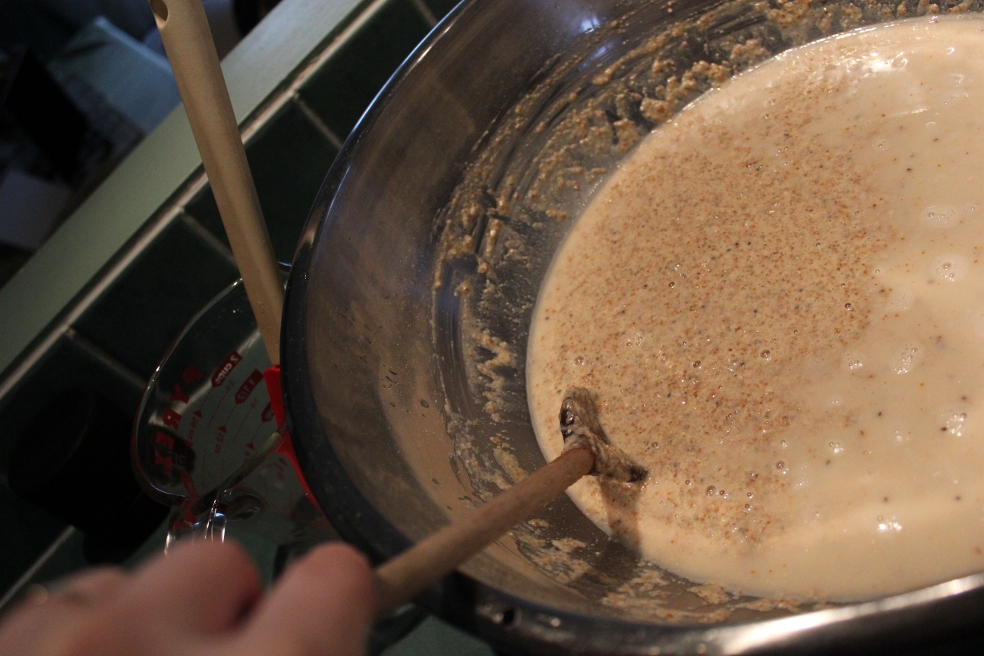
5. Grains and cereals are whisked in. My favorites of late are spelt bran or flakes, chia seeds and toasted wheat germ.
 |
| (Toasted Wheat Germ) |
 |
| (Spelt Flakes) |
 |
| (Chia Seeds) |
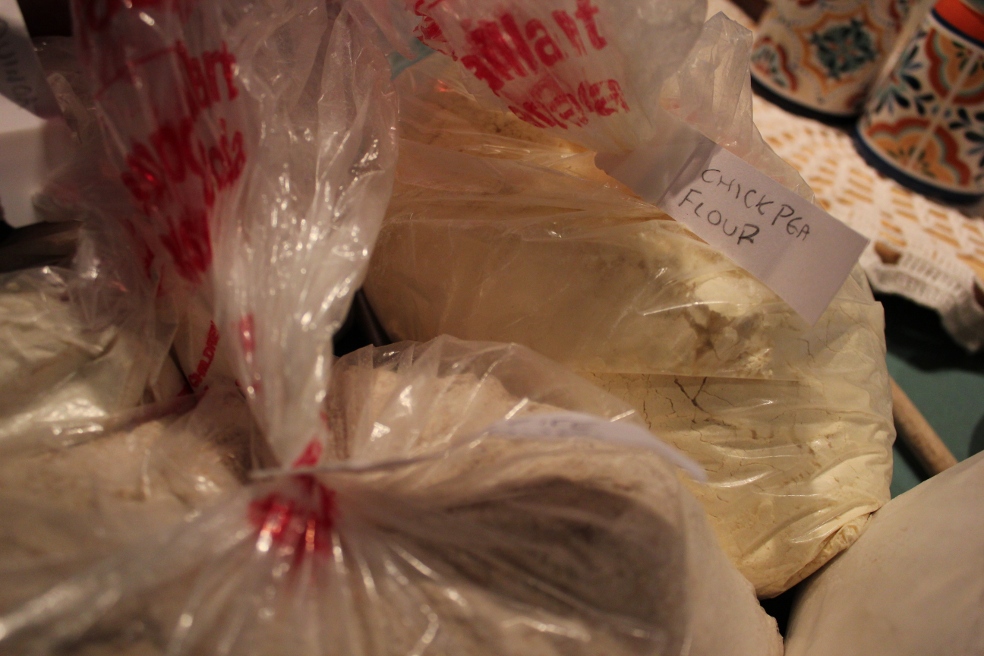
6. I add the specialty flours. Flours of choice, of late, are chickpea (a long time favorite in my bread), a local produced oat flour, red fife and quinoa.
7. Mix all the grains and specialty flours together.
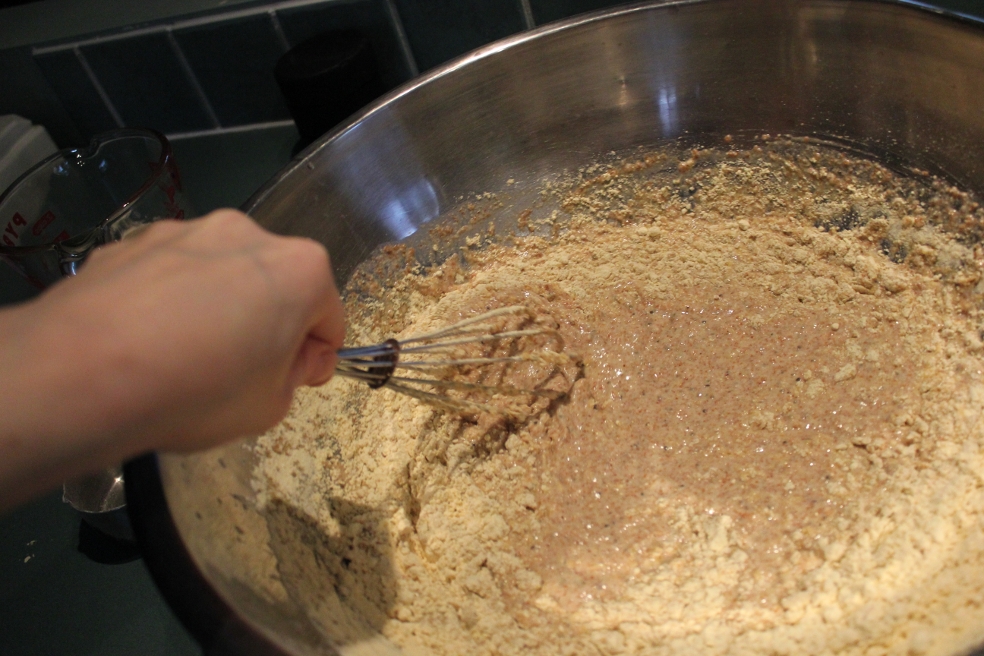
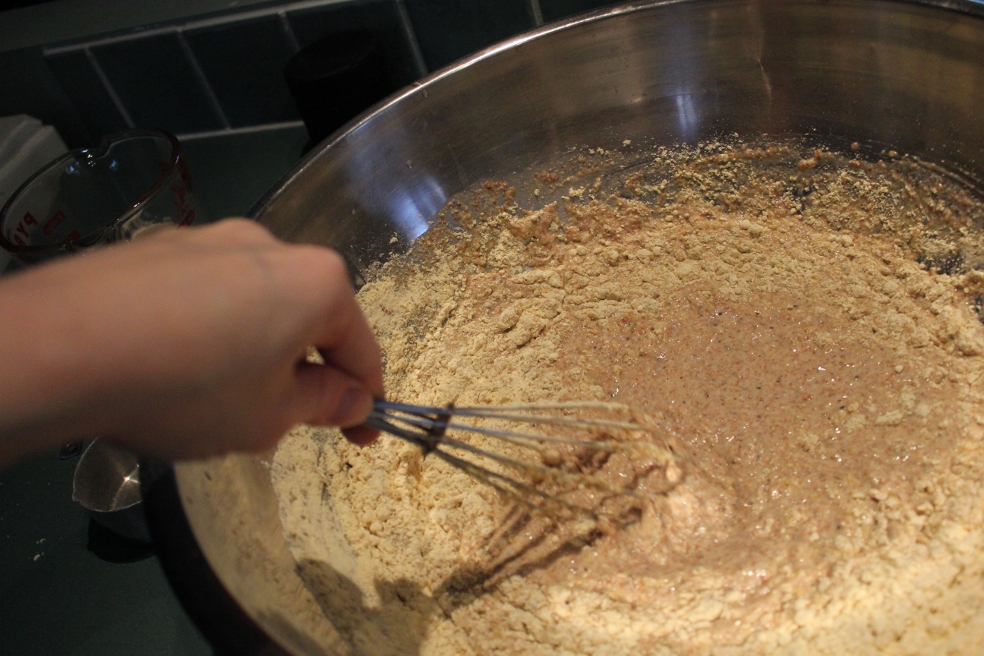
8. Now that the yeast is happy I gently spatula all of it out into the still very wet dough and then carefully fold it in.
9. Time to add the white bread flour. Today I am trying out Roger’s unbleached and additive free flour. I am expecting good things since I have used their dark rye for years and highly recommend it. Usually I pick up, with much arm strength (wink), the 20 pound bags of bread flour from costco… but can you believe this long time bread maker forgot to grab some last costco trip?!


10. I dump my dough out to kneed while it is still really sticky and messy. Trying to avoid adding any more flour then I need to seems to keep it a lighter and moister bread.
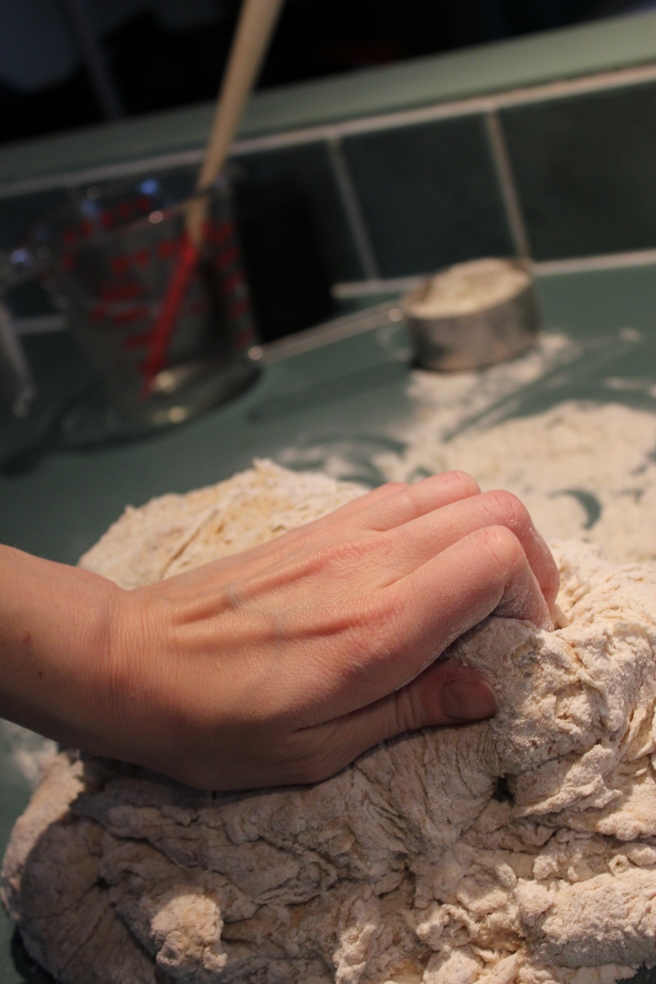
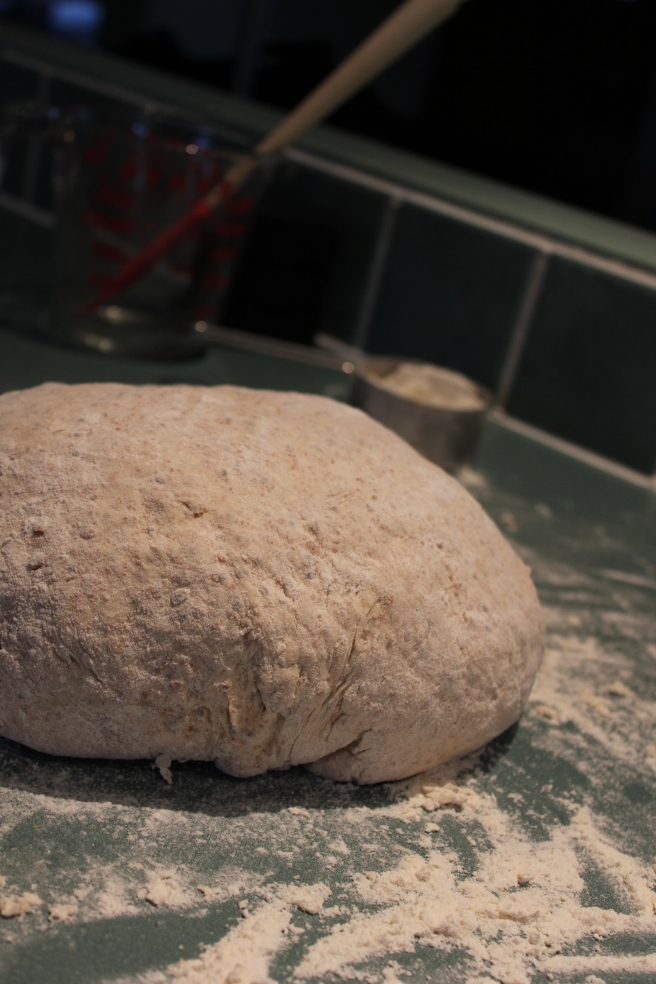
11. Kneading, such a beautiful process. Pulling, rolling, twisting and shoving the goop into a lovely ball of dough.

 |
| (Ta-da!) |
12. Well I guess this turned out to be a twelve step process 🙂 With the dough all nice and smooth, it then gets tucked into the bowl and some cozy towels to warm up and rise.
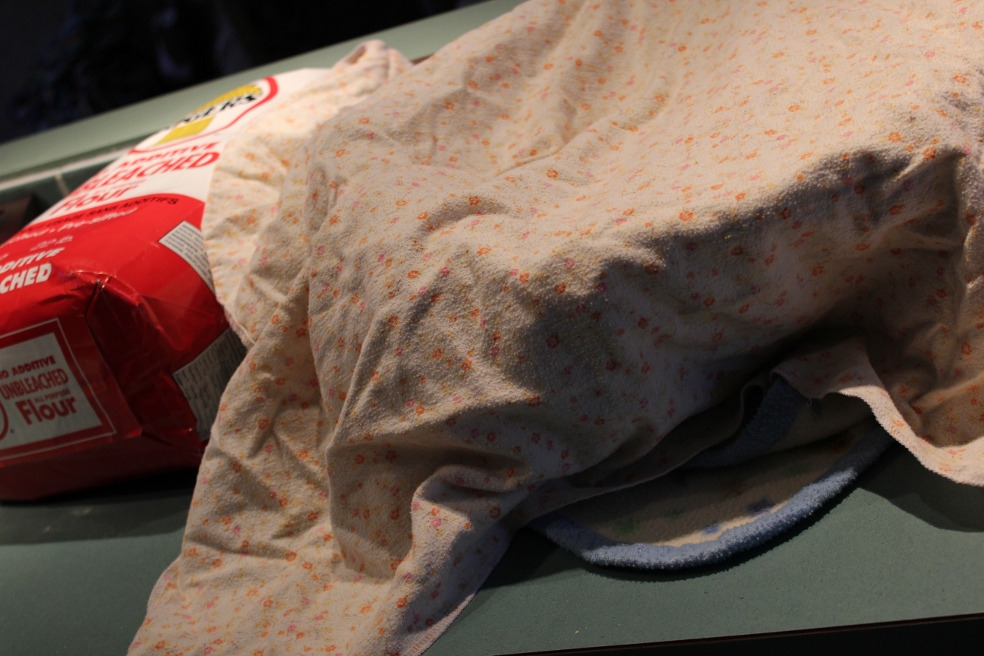
All tucked in and ready to rise and get a beating, then rise again, for most of the day. This evening I will roll it into loaves and pan it. Once it has risen one last time it will be baked, cooled and bagged. If I have the chance I will capture this finally process of making the dough BREAD. Have a beautiful day everyone!
TTFN